“As an Amazon Associate I earn from qualifying purchases.” .
Picture this: It’s a warm, sunny day, and you’re standing in the middle of your living room. The walls are dull and lackluster, and you can’t help but feel that your space is in desperate need of a refresh. The thought of hiring professional painters might cross your mind, but then you look at your wallet and realize that it’s not exactly in agreement with that idea. That’s when it hits you – we can do this ourselves! With a little bit of sweat and a lot of creativity, we can transform our room into a masterpiece.
Key Takeaways of DIY Painting a Room:
- DIY painting a room is a cost-effective way to transform your space.
- Proper planning and preparation are crucial for a successful paint job.
- Choosing the right paint color can significantly impact the atmosphere of your room.
- Employing the right painting techniques will help you achieve a professional-looking finish.
- Don’t forget the finishing touches and cleanup to complete your project.
Planning Your Paint Job
Before we dive into the exciting world of painting, let’s take a moment to plan our masterpiece. Trust us, a little preparation goes a long way when it comes to room painting. So grab your paintbrush and let’s get started!
First things first, let’s consider the amount of paint you’ll need. The quantity can vary depending on the color and finish you choose. Darker colors usually require more paint, while lighter shades may need fewer coats. As for the finish, different surfaces may require specific paint types, like satin or semi-gloss for cabinets and textured walls.
Now, let’s talk about the star of the show – choosing the right paint color for your room. This decision can be a daunting task, but fear not, we’ve got some tips to help you make the perfect selection. Take into account factors like lighting and the desired atmosphere of the room. Natural light can significantly impact the way paint colors appear, so test the color in your space at various times of the day. Use paint samples or peel-and-stick swatches to try out different shades on your walls. Trust us, it’s better to test before you invest!
Remember, painting a room is like painting a canvas – it’s a creative process, and we’re here to guide you every step of the way. So put on your thinking cap, get inspired, and let’s make your room come to life!
Preparing the Room
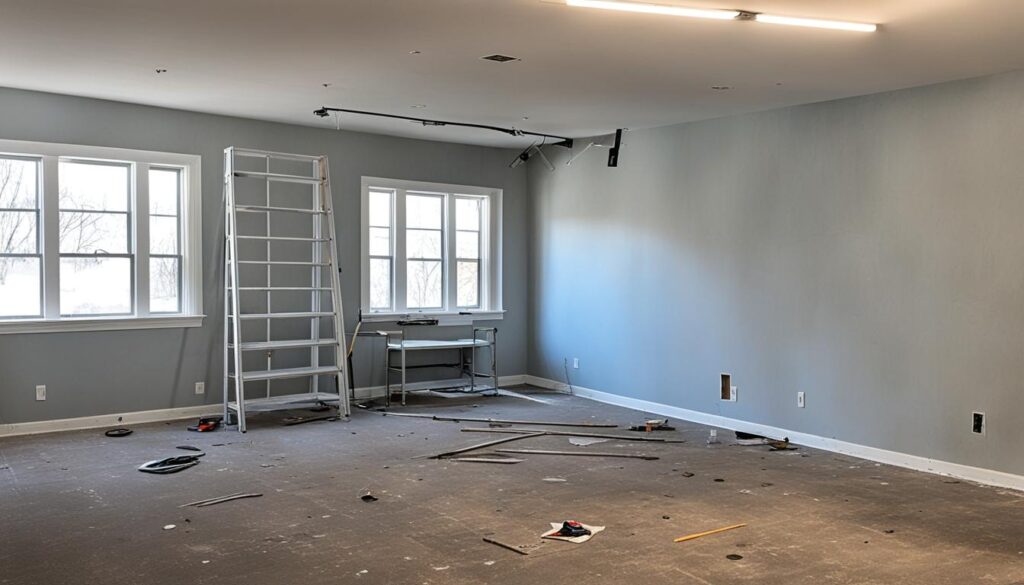
Preparing the room is a crucial step in achieving a professional-looking paint job. We want to ensure that our walls are clean and smooth, providing the perfect canvas for our creativity. Let’s dive into the essential tasks that need to be done to get our room ready for a fresh coat of paint.
Clearing the Space
Before we begin, it’s important to remove all furniture and fixtures from the room. Clearing the space allows us to work more freely and ensures that our belongings won’t be accidentally splattered with paint. If you have limited space or heavy furniture that cannot be moved, simply push them to the center of the room and cover them with drop cloths or plastic sheeting. This will protect them from any potential drips or spills.
Taping and Protecting
Next, we’ll need to use painter’s tape to protect edges, moldings, and outlets from paint drips. Take your time to carefully apply the tape along the areas that need to be protected. This step will help us achieve clean lines and sharp edges in our finished paint job.
Prepping the Walls
Now that the space is clear and protected, we can focus on preparing our walls. Start by cleaning the walls using a solution of dish detergent and warm water. This will remove any dirt, grease, or stains that could affect the paint’s adhesion. Rinse the walls thoroughly and allow them to dry completely.
After the walls are clean, inspect them for any holes or cracks. Patch these imperfections using a spackling compound or wall filler, and then sand the surfaces to create a smooth canvas for our paint. Sanding also helps to remove any rough spots or imperfections, ensuring that our walls are ready for a flawless finish.
Painting Supplies Checklist
Before we move on to the next step, it’s important to have all the necessary painting supplies at hand. Here’s a checklist of items you’ll need:
| Painting Supplies | Quantity |
|---|---|
| Paint rollers | 2-3 |
| Paint brushes | Assorted sizes |
| Paint tray | 1 |
| Drops cloths or plastic sheeting | Enough to cover the entire floor |
| Painter’s tape | 1-2 rolls |
| Spackling compound or wall filler | 1 container |
| Sandpaper (medium grit) | 1-2 sheets |
| Paint primer (if needed) | 1 can |
| Paint | As needed |
Make sure you have all these supplies before starting your paint job. Having everything on hand will help you work efficiently and avoid unnecessary interruptions.

With the room prepared and the necessary supplies in place, we are now ready to move on to the next step: priming the walls. This crucial step ensures excellent paint adhesion and helps achieve a long-lasting, professional finish. Let’s dive into the world of primers in the next section.
Priming the Walls
When it comes to achieving a flawless finish on your walls, a coat of primer can make all the difference. In this section, we’ll explore why priming is an essential step in the painting process and share tips for selecting the best paint for walls and priming them effectively.
Primer serves as a foundation for your paint, ensuring a smooth and even surface. It helps to seal the walls, ensuring that the paint adheres properly, and covers any stains or imperfections. By creating a uniform base, primer enhances the durability and longevity of your paint job.
When shopping for primers, consider the type of surface you’re working with. Different wall materials may require specific types of primers. For example, there are primers designed for drywall, concrete, plaster, and more. Choose a primer that is compatible with your wall surface to ensure optimal results.
Choosing the Best Paint for Walls
Now that you understand the importance of priming, let’s dive into selecting the best paint for your walls. With countless options available, it can be overwhelming to choose the right one. Here are a few key factors to consider:
- Finish: Decide on the level of sheen you desire, such as matte, satin, eggshell, or semi-gloss. Each finish has its own unique aesthetic and functional properties.
- Durability: Consider the level of wear and tear your walls will experience. For high-traffic areas, opt for paints with enhanced durability and washability.
- Color Quality: Look for paints that provide excellent color retention and resist fading over time.
Remember, the best paint for walls is the one that suits your specific needs and preferences. It’s always a good idea to test a small portion of your wall with sample paints to ensure you’re happy with the color and finish before committing to the full job.
Efficiently Priming Your Walls
Now that you’ve selected the perfect primer and paint, it’s time to prime your walls. Follow these steps to ensure a smooth and successful priming process:
- Prepare the surface by cleaning it thoroughly with mild soap and water. Remove any dirt, grease, or loose paint before applying primer.
- Use painter’s tape to protect trims, baseboards, and any areas you want to keep paint-free.
- Apply primer using a roller or brush, following the manufacturer’s instructions. Begin from the top and work your way down, ensuring even coverage.
- If you’re making a drastic color change or painting over dark or stained walls, consider using a tinted primer. This will help to improve coverage and ensure that your final paint color appears true.
Once you’ve primed your walls, allow ample drying time before applying your chosen paint color. Check the manufacturer’s instructions for the recommended drying time.
“Priming walls is like creating the perfect canvas for your masterpiece. With the right primer and paint, your walls will be ready to showcase your style and personality.” – Our Painting Experts
Remember, priming your walls is an essential step in the painting process. It sets the foundation for a flawless finish, enhances durability, and ensures the true color of your paint shines through. Don’t skip this crucial step and enjoy the benefits of a professionally primed and painted space.
| Benefits of Primer | Tips for Choosing the Best Paint for Walls | Efficiently Priming Your Walls |
|---|---|---|
| 1. Seals the surface | 1. Consider the desired finish | 1. Clean the walls thoroughly |
| 2. Covers stains and imperfections | 2. Assess durability needs | 2. Use painter’s tape for protection |
| 3. Ensures paint adhesion | 3. Look for excellent color quality | 3. Apply primer using a roller or brush |
| 4. Enhances paint durability and longevity | 4. Consider using a tinted primer for color changes |
Applying the Paint
Now that we’ve prepped and primed your walls, it’s time to unleash our inner artist and start painting! Get ready to make those walls come alive with color and style.
“Painting is just another way of keeping a diary.” – Pablo Picasso
We’ll guide you through the step-by-step process of applying paint like a pro, even if you’re just starting out. Let’s dive in!
1. Cutting in the Edges
Before we grab our trusty roller, we need to pay attention to the details. Use a high-quality brush and dip it into the paint. Carefully apply the paint along the trim, corners, and ceiling, known as “cutting in”. This precision work creates clean and crisp lines, giving your paint job that professional touch.
2. Rolling it Out
Now it’s time for the main event! Grab your roller and dip it into the paint tray. Start by rolling the paint onto the wall in a “W” pattern. This technique ensures even coverage and avoids any streaks or lines. Work in small sections, overlapping each stroke to blend the paint seamlessly.
3. Multiple Coats for Perfection
Remember, great things take time, and so does a flawless paint job. Allow each coat to dry completely before applying additional coats. Depending on the color and finish, you may need to apply multiple coats to achieve the vibrant and consistent look you desire.
4. Fun Fact: Mix it Up!
Looking to add a touch of creativity to your walls? Experiment with different painting techniques to achieve unique effects. Try techniques like sponge painting, color washing, or using a textured roller to bring depth and dimension to your space. Let your imagination run wild!
As beginners, it’s important to remember that practice makes perfect. Don’t get discouraged if your first attempt isn’t flawless. With each stroke of the brush, you’ll gain confidence and refine your painting techniques for beginners. Before you know it, you’ll be a seasoned painter!
Painting Techniques and Tips
To achieve a professional finish, it’s important to employ proper painting techniques. Here are some valuable tips and tricks for beginners:
Use the Right Tools
Invest in high-quality paintbrushes and rollers to ensure better coverage and control. The type of brush or roller you choose can impact the final result, so opt for ones recommended for the specific paint you’re using.
Avoid Pressing Too Hard
When applying paint with a brush or roller, avoid pressing too hard or overloading them with paint. This can lead to streaks and drips, resulting in an uneven finish. Apply moderate pressure and distribute the paint evenly for a smooth coat.
Work in Small Sections
To maintain control and achieve even coverage, work in small sections of the wall at a time. Start from the top and work your way down, ensuring each area is fully covered before moving on to the next.
Maintain a Wet Edge
To avoid visible brush or roller marks, maintain a wet edge while painting. This means overlapping each stroke with the previous one while the paint is still wet. This technique helps blend the paint layers seamlessly.
Consider a Paint Sprayer for Large Areas
If you’re painting a large area, such as an entire room or a large accent wall, consider using a paint sprayer. This can make the application more efficient and provide a smooth, even finish.
Take Your Time
Painting requires patience and attention to detail. Take your time and avoid rushing through the process. Allow each coat of paint to dry fully before applying additional coats or making touch-ups.
By following these painting techniques and tips, you can achieve professional-looking results, whether you’re a beginner or experienced DIYer.
Finishing Touches and Cleanup
Now that you’ve applied the final coat of paint and it has dried partially, it’s time to add those finishing touches and clean up the mess. We don’t want any smudges or stray paint ruining your hard work, do we?
A Clean Break
First things first, let’s remove that painter’s tape. But wait! Before you start peeling away, let us share a little secret with you. To avoid peeling off any paint, gently pull the tape at a 45-degree angle while the paint is still partially dry. Trust us, it works like a charm.
Clean Brushes, Happy Painting
Cleaning your paint brushes and rollers is an essential part of the post-painting process. For latex paints, warm soapy water will do the trick. Simply give your brushes and rollers a gentle scrub until the water runs clear. As for oil-based paints, you’ll need an appropriate solvent to cut through the sticky residue. Make sure to follow the manufacturer’s instructions for best results.
Storing Memories (and Leftover Paint)
Properly storing any leftover paint is a wise move for future touch-ups. Before sealing the lid, clean the rim of the paint can to create an airtight seal. Store the paint in a cool, dry place away from extreme temperatures or direct sunlight. And don’t forget to label the can with the paint color, room, and date for easy reference down the road.
Now that the paint is drying and the tools are clean, it’s time for the final step—putting everything back to its rightful place. Move the furniture back into position, remove those drop cloths, and enjoy the beauty of your freshly painted room.
In the words of Picasso, “Every artist dips his brush in his soul and paints his own nature into his pictures.” So go ahead, paint your own nature and create a space that truly reflects your style and personality.

| Room Painting Tips | Cleaning Paint Brushes |
|---|---|
| Remove painter’s tape at a 45-degree angle while the paint is partially dry. | Clean brushes and rollers with warm soapy water for latex paints or appropriate solvent for oil-based paints. |
| Properly store any leftover paint for future touch-ups. |
Conclusion
So there you have it, a step-by-step painting guide to help you transform any room in your home. DIY painting can not only save you money but also give you the satisfaction of achieving a professional-looking finish. By planning your paint job carefully, properly preparing the room, and using the right techniques, you can create a fresh and inviting space.
Remember, the key is to take your time and pay attention to the details. Rushing the process can lead to mistakes and a less-than-perfect result. So grab your paintbrushes, put on your favorite playlist, and get ready to bring a splash of color to your walls.
We hope this guide has been helpful and that you feel empowered to take on your next painting project. With the right tools and a little creativity, the possibilities are endless. Happy painting!
FAQ
How do I choose the right paint color for my room?
What supplies do I need for painting a room?
Do I need to prime my walls before painting?
What are some painting techniques for beginners?
How do I clean paint brushes and rollers?
“As an Amazon Associate I earn from qualifying purchases.” .


